DTF transfers have surged in popularity among designers and shop owners seeking vibrant prints with simpler workflows. This method, often called direct-to-film printing, uses a film intermediary and adhesive steps to bond artwork to a wide range of fabrics. A common comparison is DTF vs screen printing, highlighting how DTF handles color complexity and performance on dark fabrics. The DTF transfer process typically involves printing onto a film, applying adhesive powder, curing, and transferring with heat, which is outlined in many DTF quality tips. Understanding fabric compatibility and proper curing can help you predict performance across cotton, blends, and poly fabrics, making DTF fabrics compatibility a key consideration for beginners.
Another way to describe this approach is a film-based digital textile transfer, where artwork is printed on a special substrate and bonded to fabric with heat. Rather than printing directly onto the garment, the design travels first to a printable film, then undergoes a curing and bonding step before being pressed onto cotton, blends, or poly fabrics. LSI-friendly terms like film-to-fabric transfer, adhesive transfer, and heat-applied image transfer help search engines understand the concept alongside phrases such as the DTF transfer process and fabrics compatibility. For those evaluating options, resources often compare this method with screen printing and DTG, highlighting practical tips and considerations for color accuracy and durability.
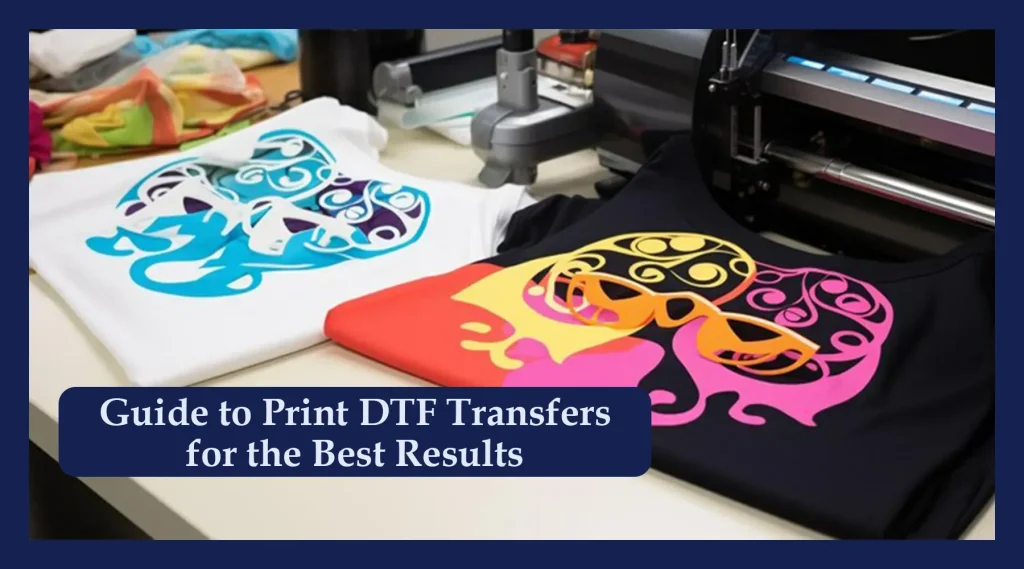
Understanding Direct-to-Film Printing and DTF Transfers
DTF transfers describe a modern approach to garment decoration that leverages direct-to-film printing. In this workflow, a design is printed onto a special film using a printer equipped with white and color inks, then adhesive powder is applied, the film is cured, and finally the image is transferred to a garment with heat. The entire process exemplifies the direct-to-film printing model, yielding a vibrant, durable result that works across a range of fabrics. The white underbase layer is a key feature that helps colors pop, especially on dark fabrics.
One of the core strengths of DTF transfers is their versatility and ease of setup, which reduces pretreatment concerns and expands compatibility with various materials. This approach aligns with the strengths of direct-to-film printing and offers strong color reproduction with relatively straightforward workflows. When considering DTF transfer process steps and outcomes, designers often note how easily complex colors and gradients translate from screen-like artwork to fabric without the same level of setup required by some traditional methods.
DTF vs Screen Printing: Choosing the Best Path for Your Garment Project
DTF vs screen printing presents a classic trade-off between flexibility and scale. For small runs, intricate color work, and on-demand orders, direct-to-film printing (DTF) shines because it minimizes screens, setup time, and per-unit costs while handling complex color profiles and subtle gradients. Screen printing, by contrast, excels in large-volume runs with simple, bold designs and long-lasting inks, where the cost per unit drops dramatically with volume.
When deciding between DTF transfers and screen printing, consider your typical order size, color complexity, and turnaround needs. DTF often offers faster setup and easier design changes, making it a strong fit for boutique brands, custom orders, and small studios. If you anticipate high-volume production with high-contrast single or few-color designs, screen printing may offer cost advantages and durability advantages over multiple-color DTG-like processes.
The DTF Transfer Process: Step-by-Step for Consistent Quality
A clear understanding of the DTF transfer process helps producers optimize quality at each stage. Begin with design and color management, ensuring artwork is high-resolution (at least 300 dpi) and that colors map accurately using soft proofing and ICC profiles if available. This stage sets the foundation for crisp details and faithful color reproduction across fabrics, aligning with best practices in direct-to-film printing workflows.
Next, print on the specialized film with white and color inks, calibrating the printer to minimize color shifts between batches. After printing, spread adhesive powder evenly and cure the film to create a durable bond. The garment is then pre-pressed to remove moisture, followed by aligning the film and applying heat under the appropriate time and temperature for the chosen film and fabric. Finally, post-press care and cooling help set the image for long-lasting wear.
This step-by-step approach embraces the DTF transfer process as a repeatable, quality-driven workflow. Consistent color management, proper curing of the adhesive, and careful heat application all contribute to reliable results that hold up to washing and wear across different fabrics.
DTF Fabrics Compatibility: What Works Best Across Materials
DTF transfers are celebrated for their fabric versatility, with strong performance on cotton, cotton blends, and many poly blends. Cotton and its blends typically offer bright colors and robust adhesion, while poly and poly blends can also produce vibrant results when pressing parameters are tuned for the fabric’s characteristics. The white underbase helps ensure opacity on dark fabrics, but the exact look varies with ink density and fabric composition.
Dark versus light fabrics present unique considerations in DTF fabrics compatibility. The white base is notably advantageous on dark garments, but it requires careful calibration of ink coverage and heat settings to avoid translucency or color shifts. Always test on a sample of the target fabric to confirm opacity, texture, and adhesion before committing to full production, and be mindful of special textiles that may need adjustments in pressing time or temperature.
DTF Quality Tips and Troubleshooting: Maximize Durability and Look
DTF quality tips begin with solid color management and a reliable curing process. Align expectations with the white base, ensuring sufficient white ink coverage to achieve opaque, vibrant results on dark fabrics. Regular printer calibration, nozzle checks, and color profiling help maintain consistency across runs, while a higher print resolution (3 00 dpi or above) supports crisp details and smooth gradients.
Practical troubleshooting focuses on common issues like cracking, fading, and edge peels. Ensure proper alignment, even heat distribution, and adherence to the film manufacturer’s guidance for peel methods and post-press hold times. If white underbase gaps or translucency occur, increase white ink deposition or adjust the order of deposition on the film. Providing customers with accurate care instructions—washing inside-out, cold cycles, and avoiding direct high heat—further preserves transfer quality over time.
Frequently Asked Questions
What are DTF transfers and how do they relate to direct-to-film printing?
DTF transfers are created by printing a design onto a special film using white and color inks, applying an adhesive powder, curing the film, and then transferring the image to a garment with heat. Direct-to-film printing is essentially another name for the same process, so there is no separate workflow. DTF transfers offer vibrant color, strong fabric compatibility, and usually do not require fabric pretreatment.
DTF transfer process: what are the main steps from design to garment?
The DTF transfer process follows several key steps: 1) design and color management, 2) printing on the film with white and color inks, 3) applying adhesive powder and curing, 4) preparing the garment with pre-press, 5) heat transfer to the garment, and 6) post-transfer care. Managing color accuracy, proper curing, and precise heat application are essential for consistent DTF transfers.
DTF vs screen printing for small runs: which is better?
DTF transfers are typically better for small runs and complex color designs due to quicker setup and easy design changes, while screen printing becomes more cost-effective at large volumes with simpler colors. DTF transfers also handle dark fabrics well because of the white underbase, whereas screen printing may require more screens for opaque results. Consider your run size, color complexity, and turnaround when choosing DTF transfers over screen printing.
DTF fabrics compatibility: which fabrics work best with DTF transfers?
DTF transfers work well on a wide range of fabrics, with cotton and cotton blends being especially reliable. Many poly blends also respond well, though you may need to adjust color management and temperature. Dark fabrics benefit from the white underbase for opacity, but always test a sample before full production to confirm durability and appearance.
DTF quality tips: what practices improve color vibrancy and durability?
DTF quality tips include regular printer calibration, using high-quality white and color inks, and maintaining a printing resolution around 300 dpi for crisp details. Ensure the adhesive powder cures completely, perform control tests on similar fabric, and provide proper post-transfer care instructions to preserve color and adhesion in DTF transfers.
| Aspect | Key Points |
|---|---|
| What are DTF transfers | – Print a design onto a special film using white and color inks – Apply adhesive powder and cure the film – Transfer to a garment with heat for a vibrant, durable print – Works on a wide range of fabrics; often requires no fabric pretreatment. |
| DTF vs DTG / Sublimation / Screen Printing | – DTF uses a film intermediary; better on dark fabrics and simpler setup than DTG – DTG prints directly on fabric; more pretreatment and color/base-color sensitivity – Sublimation requires polyester; DTF works on cotton, blends, and poly blends – Screen printing is cost-effective for large runs; DTF excels in short runs and complex colors. |
| DTF Transfer Process (Steps) | 1) Design & color management: high-res artwork (≥300 dpi) with color management 2) Printing on film: white underbase, then color inks; calibrate printer 3) Adhesive powder & curing: apply powder evenly and cure 4) Preparing the garment: pre-press to remove moisture and smooth surface 5) Heat transfer: 150–170°C for 15–25 seconds; hot/warm peel 6) Post-transfer care: cool down; provide care instructions. |
| Materials & Setup | – Films: specialized DTF transfer films – Inks: white and color inks compatible with DTF printers – Adhesive Powder: bonding agent for film+fabric – Printer & RIP Software: reliable color reproduction – Heat Press: even temperature; larger platens recommended – Garment Preparation Tools: collar board, lint roller, tweezers |
| Fabric Compatibility | – Cotton & cotton blends: typically excellent – Polyester & blends: works on many poly blends with adjustments – Dark vs Light fabrics: white underbase enables vibrant results on dark fabrics – Special textiles: test on samples; adjustments may be needed |
| Quality & Best Practices | – Align colors with the white base to boost vibrancy on dark fabrics – Regular printer calibration and maintenance – High print resolution (≥300 dpi) for crisp details – Proper curing of the white underbase – Test on similar fabrics before full runs – Consider texture/hand feel; may vary with materials – White ink management for opacity on dark fabrics |
| Troubleshooting | – Cracking/peeling: check pressing, curing, and peel method – Fading/color shift: recalibrate color profiles and inks – White underbase gaps: increase white ink coverage – Edges peeling: ensure alignment and even heat distribution |
| Care & Longevity | – Turn garments inside out before washing – Use cold/warm water with mild detergents – Avoid high-heat dryers; air dry preferred – Do not iron directly over the transfer (use a protective sheet) – Store away from direct sunlight |